Hi Grant Life readers. My name is Michaela and I blog over at Covered in Mod Podge. I am a wife, a mom to a very active eighteen month old little miss, and an MSW student interning with a large, urban school district. After all that, I try to find time to sew for my daughter and craft to stay sane!
I am so excited to be contributing sewing and crafty related tutorials here at The Grant Life. I’ll be by about twice a month sharing whatever project I’ve been working on lately. As you all know, Kelley has to be one of the sweetest women in blogland. I am so excited to be working with her!
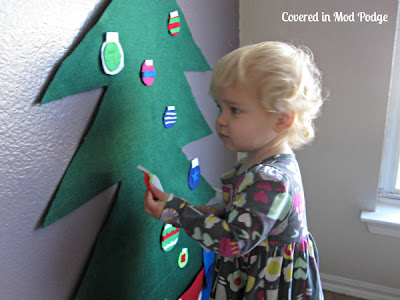
As I mentioned above, I have an eighteen month old daughter who is nothing but energy. She does not stop. Ever. We already had enough of a problem with our Christmas tree due to our three cats. We can only decorate the top half. Emma is at the age where she’s old enough to want to be in the tree all the time but not old enough to understand to stay out of it. Rather than pull my hair out this Christmas season, my husband and I decided not to put up the tree this year.
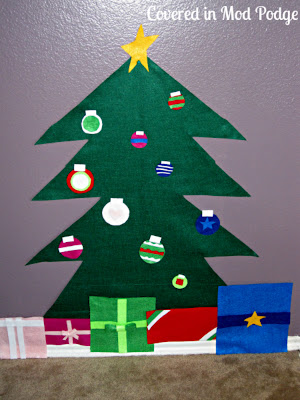
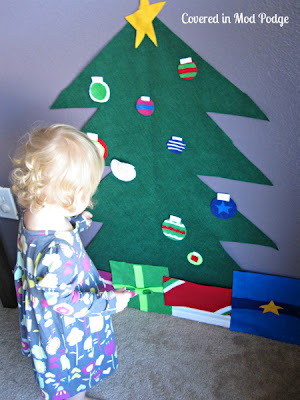
I still wanted something festive in our living room. Hence, this felt tree. Felt sticks to itself. Emma can go nuts decorating and redecorating the tree. I’m hoping she’ll play with it over and over again!
Want to make your own? You’ll need:
Green Craft felt sold by the yard. {It’s 72 inches wide so you’ll only need to buy the width you want. I got 3/4yd just to be safe and had tons left!}
Various Colored Craft Felt Squares
Hot glue
Craft ruler, scissors, and large cutting surface {I used a rotary cutter for cutting my tree}
3m Command Strips
Start out by evening up your green tree felt. Then, cut it to height according to your space {and child’s height}. For me, this was 30 inches.
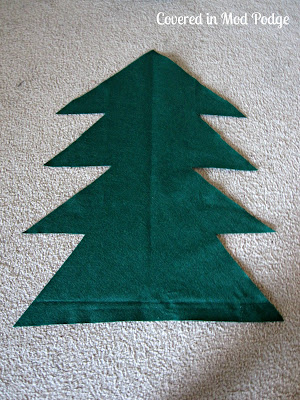
To make the tree shape, you’ll start by folding the green felt in half hot dog style.
To explain how to cut the tree shape, I’ll give you the dimensions I used. You’ll need to adjust these according to your desired height. It helped me to have a picture of a clip art Christmas tree open while I was cutting.
Starting at the bottom, cut in 12 inches at an angle. Next, cut out parallel to the bottom towards the outside 6 inches. Cut 12 inches inward at an angle. Now cut parallel to the bottom 7.5 inches. Cut on an angle 9.5 inches and out 6 inches. Now cut your top point on a 15 inch angle.
Now, its time to make the presents to line the bottom of your tree. I made five different presents.
I made three squares measuring 8 inches by 8 inches, 10 inches by 10 inches, and 9 inches by 9 inches. I made two rectangles measuring 8 inches by 4 inches and 11 inches by 3 inches.
Decorate your packages as you desire. Use hot glue to attach these decorations. Hot glue the presents together into a long strip and then glue them to the tree.
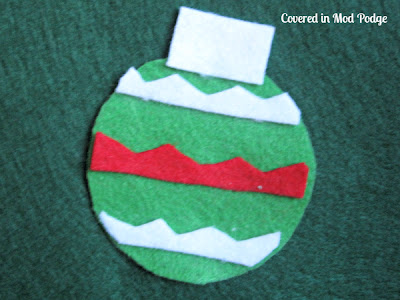
Almost done! It’s time to go nuts making ornaments. I used various sized cups and bowls to draw the circles onto my felt. I also cut small rectangles to look like ornament tops. Be sure to use either a marker close to the color of the felt or a disappearing ink pen. If you create decorations for the ornaments, hot glue them on.
Don’t forget to make a star for the top of the tree!
Now, use the command strips to attach the felt tree to your wall in several places. You don’t want curious hands pulling the tree down.
Let your little one loose to enjoy their new-found Christmas fun!
Send me an email at coveredinmodpodge {at} gmail {dot} com if you have any questions! I’d also love to see any of your cuties playing with their felt tress!
Thanks again, Kelley for having me over today! I’ll see you all next month for easy and affordable wrapping ideas!
- Homemade Salisbury Steak - November 23, 2025
- Easy Hot Cocoa Dip - November 13, 2025
- Peppermint mocha syrup - November 12, 2025






MiMi says
SO super cute!!
Kelley says
Right?! I need to make one!
Sandy a la Mode says
this is such a cute craft project!!
xo,
Sandy
Sandy a la Mode
Kelley says
Thanks Sandy! 🙂
Vanessa says
Thank you for posting this…very easy to do. I just finished the tree and the presents…..cutting out the ornaments now. We won’t be home for most of December so we’ve decided not to put up the tree. This is a great alternative for my little one to decorate as part of one of her advent activities. Since we’ll be traveling a lot, I’m even considering packing this so we can take her tree with us on the road.
Kelley says
Oh thats great! Im so glad you are able to have a ‘tree’ this year! Packing it up is a great idea! 🙂
Michaela says
I’d love to see what you make! Could you email me a picture at coveredinmodpodge (at) gmail (dot) com, pretty please?!
Thanks!
Michaela
vanessa says
i sent you the pix of our tree….did you get it? i’m so new to this blogging thing so i hope i got it right.
Kelley says
Where did you send them Vanessa? 🙂
Michaela says
Thanks so much for the pictures! What a fun little tree!
Missy Rogers says
This is cute. I once lived in a 2 bedroom apartment with my ex husband and 3 children. We took a fake Christmas tree, pushed all the branches to the front so it was half a tree and fastened it to the wall. There was not room otherwise for a tree. I have a link up if you would like to add this to it. Any other holiday post for that matter. http://bit.ly/11x31re
Kelley says
Thats such a smart idea Misty!
Adrianne at Happy Hour Projects says
What a brilliant idea!! This would be perfect for my 2-year old daughter… maybe it would keep her away form the *real* ornaments on the tree?? LOL!
Kelley says
Haha! Maybe! Its worth a try 🙂
Candy @ Candypolooza says
OMG SOOO Cute!! I may have to make one for the hallway!!
Kelley says
Ohhh I bet Ezra would love it!! 🙂