We all have been spoiled with the ad service, Passionfruit Ads. I love them as much as everyone else does [I even did a vlog tutorial on how to use em!] but I am sad to see that they are charging a monthly fee soon. From a business standpoint I totally get it. Its no fun to lose money on something. From a blogger standpoint I sorta get it. If you sell a bunch of ads and make decent money from it [hollla! go girl!] then its worth the monthly fee. For smaller blogs and people who only use it for swaps, it kinda stinks. So Im going to show you how to easily add a button to your sidebar – on both blogger and WordPress.
Sidebar Width
The first thing you need to know before you add a button is how wide your sidebars are. This will help so that your buttons don’t overlap or look wonky. To find out how wide they are in blogger go to Template > Customize > Adjust Widths.
So my sidebar is 360 pixels wide. [I only have one on this particular blog, you may have two.] This means that any button I want to put needs to be 360 pixels or smaller. I would even say 350 just to be safe. If you want to add two buttons next to each other make sure that combined they are less then your sidebar width. [Example: one 200×200 button and one 150×150 button should fit fine.]
To find your width of WordPress you will need to:
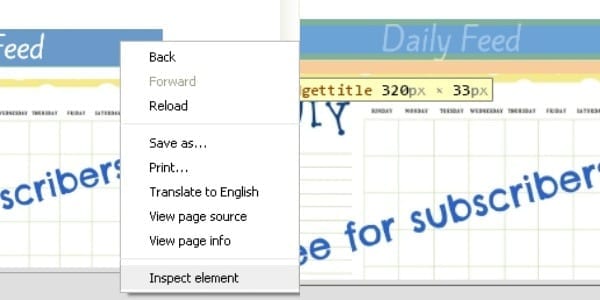
Right click on a part of your sidebar. [I used my heading for ‘Daily Feed’] Click on ‘Inspect Element’ and your pixels will show up highlighted. My sidebars are 320 pixels wide. Even though my sidebars are 320 pixels, I resize them down to 300 just to be on the safe side.
Add the HTML
Sometimes the button you are trying to add already has an HTML that you can copy and paste and is the right width for your sidebar. [Score!]
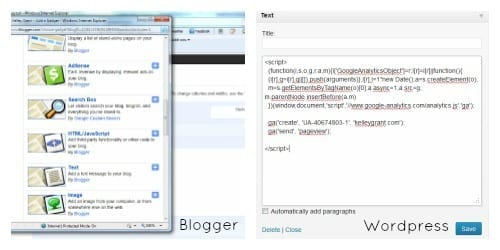
If you are on Blogger go to ‘Layout’>’Add Gadget’>’HTML’ and paste the code. Save.
If you are on WordPress go to ‘Appearance’>’Widgets’>’Text’ and paste the code. Save.
Easy Peasy. But what if some just sends you a button with no HTML or is the wrong size?
Resizing the Button
Don’t fret! With a few extra steps you can be rockin’ that button on your sidebar in no time! I use photobucket for to edit and host my pictures. You can use something else but photobucket is what I know and love.
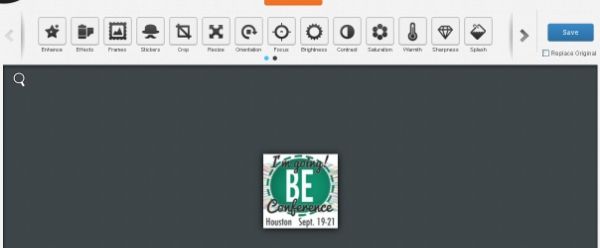
I uploaded my basic button to my photobucket account, clicked the picture then clicked ‘edit’ right above it. From here you can do a bunch of cool things with your button. Crop, resize, add text or special effects. To resize click ‘resize’ and enter the pixels you need the button to be. Remember, if your sidebar is 300 pixels then you should probably crop it down to 280-290 pixels wide. Hit save.
Editing HTML
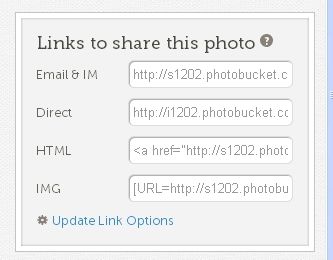
This box is on the right hand side of your screen after you save your newly resized image. Copy the link that says ‘HTML’. Now if you copy and paste that exact code into your widget/gadget its not going to take you to the site you want. You need to edit the HTML just a little bit. [Deep breaths, its really easy. Pinky swear.]
<a href=”https://s1202.photobucket.com/user/TheGrantLife/media/blog-elevated-button150_zps96096333.png.html” target=”_blank”><img src=”https://i1202.photobucket.com/albums/bb379/TheGrantLife/blog-elevated-button150_zps96096333.png” border=”0″ alt=” photo blog-elevated-button150_zps96096333.png”/></a>
All you need to change is the area in pink between the parenthesizes, that directs the button where to go. So for my Blog Elevated button I need to change it to https://www.blogelevated.com. My new code looks like this
<a href=”https://www.blogelevated.com” target=”_blank”><img src=”https://i1202.photobucket.com/albums/bb379/TheGrantLife/blog-elevated-button150_zps96096333.png” border=”0″ alt=” photo blog-elevated-button150_zps96096333.png”/></a>
The only thing that changed is the first URL. [Be sure to keep the parenthesizes though!] Take your newly resized, newly edited HTML’ed button and add it to your widget/gadget. Boom. You are rockin’ a button like a pro!
I hope this helps ease your mind on adding buttons to your sidebar. It does take a some time but once you do a few of them you should be a pro in no time!
- White Chocolate Mousse - February 16, 2024
- Slow Cooker Ground Beef Tacos - October 30, 2023
- Pumpkin Cream Iced Chai Latte - October 23, 2023




Cody Doll says
I don’t like them charging either. It sucks but I understand. Most small bloggers ate going to continue with them.
Kelley says
Yea, I get why they are charging but it does stink for smaller bloggers. Or people who aren’t making enough money of them to have the premium service. Oh well. 🙂