Hey hey! So happy to have you here for another post on Learning to Blog. Last week I shared how to buy your custom domain – woohoo! Today I’m going to go over how to add your custom domain to your blogging platform of choice. It’s easier then it sounds, promise!
Adding a custom domain to a blogger.com blog –
1. Log in to your account and go to settings
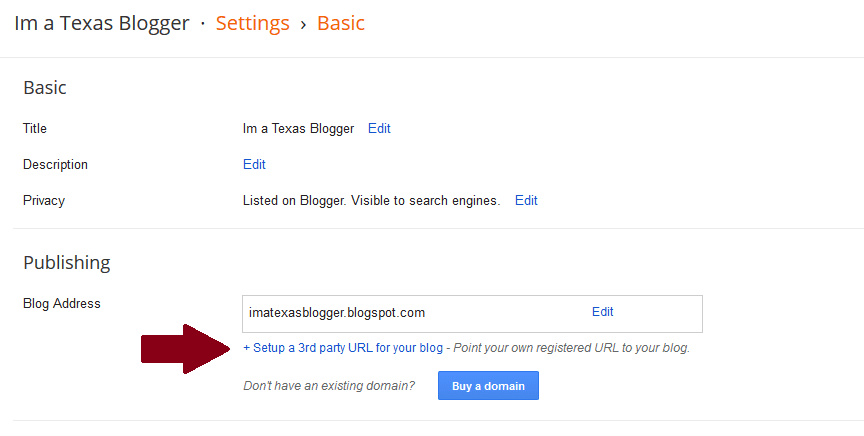
2. Scroll down to “Publishing” and then “Blog Address”.
3. Click on “+Setup a 3rd party URL for your blog”
Note – you can also buy your domain directly from blogger.com. I have not done this before since I have always used GoDaddy. But it is an option!
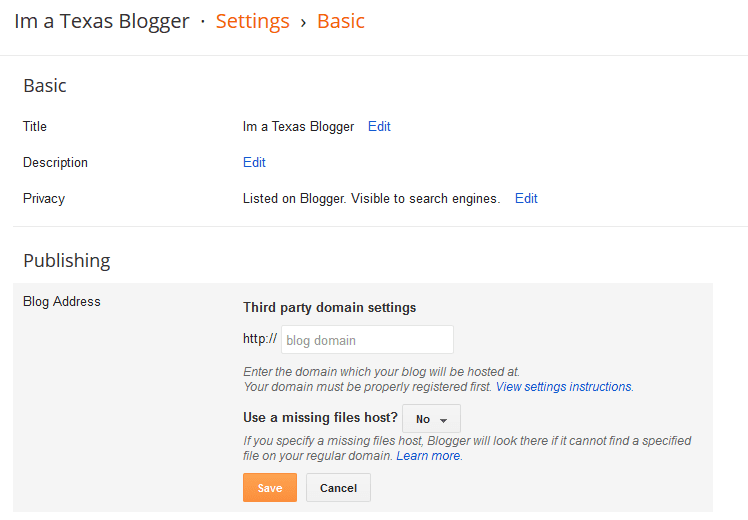
4. Type in your blog domain in the box and hit save. Be sure to type it like this – www.yourblogdomain.com.
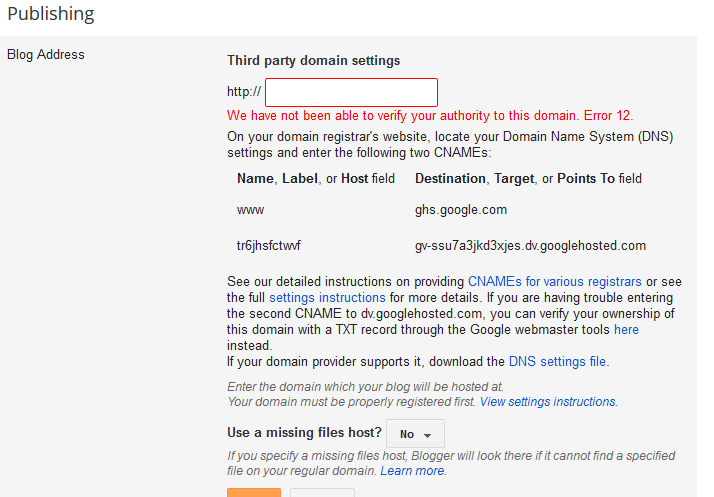
5. You should see an error after you hit save. You need to verify that you own the domain you are trying to use. Keep that page open and then login to your domain registrar – like GoDaddy.
6. Find your DNS area and look for “Host”. Click edit (the pencil in GoDaddy) and enter ghs.google.com where it says “www”. Save.
7. Next hit “Add Record” on the top left above “Host.”
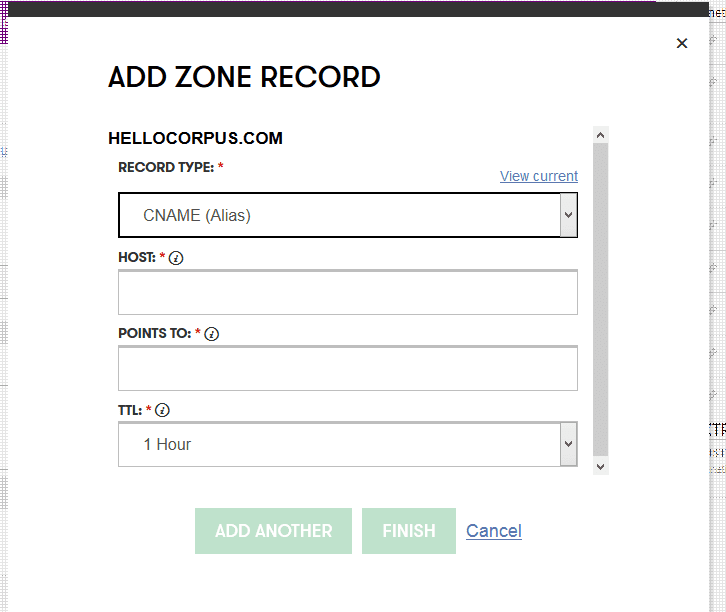
8. Enter the first set of symbols from your blogger profile in the “Host” and the second set in “Points To”. Click finish.
9. Now you have verified that you are the owner of the domain you are trying to register! You need to wait an hour before finishing though. Sometimes it may take a little longer.
10. After a bit, go back and repeat steps 1-4 again. Your new domain should be active now!
Adding a custom domain to a WordPress.com blog –
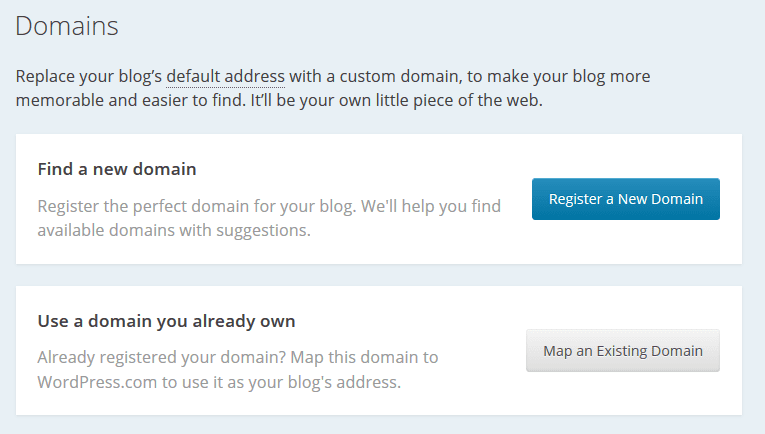
1. Log in to your WordPress.com blog and then go to https://wordpress.com/domains/.
2. In order to add your custom domain to your WordPress.com blog there is an annual charge of $13/year to do this or you can purchase your domain through WordPress.com.
I would assume the process is similar to the blogger.com setup on configuring your custom domain that you already own. You need to set the login into your DNS file and change your host. Since I don’t have a WordPress.com blog, I wasn’t up for paying the $13 to find out the exact steps. You can find more details on here on how to set it up.
Adding a custom domain to a WordPress.org blog –
1. In order to add your custom domain to a WordPress.org blog you need to have a host first. I highly recommend RFE hosting! You can also sign up through GoDaddy or any other hosting company. (Blue Host, Host Gator, etc.)
2. Once you have hosting, you have to point your domain address to your new host. Log in to your domain registrar account and your hosting account. You will need information from both.
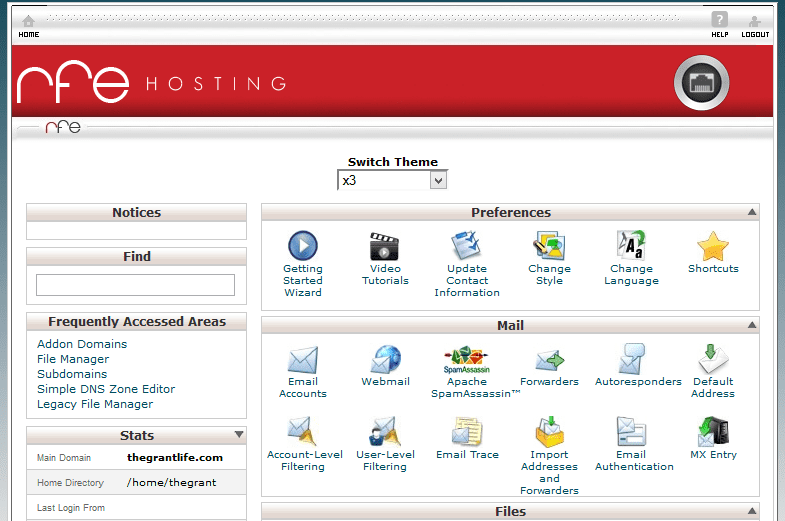
3. Find your “cPanel” on your hosting site and head to your “DNS” section in your registrar. I’m not going to lie – the cPanel scares the pants off of me! I don’t want to break anything and there is A LOT of information back there. But fear not! You only need a few easily accessible things to set your domain.
4. Scroll down until you see “Shared IP Address” on the left hand side under “Stats”. Copy that IP address down.
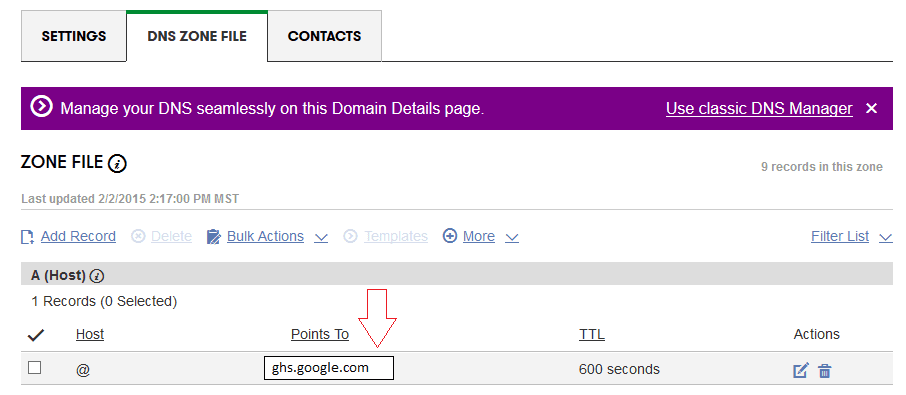
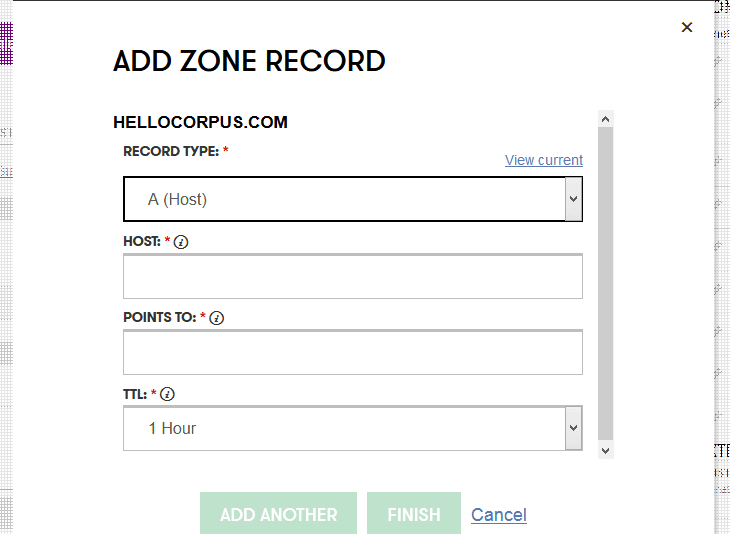
5. In GoDaddy, click “Add a Record” in your DNS Zone file on the top left. The window above pops up. Enter “@” for Host and the IP address for Points To. Click save.
6. Give it a few minutes to transfer then head back to your cPanel. Find the WordPress icon at the bottom.
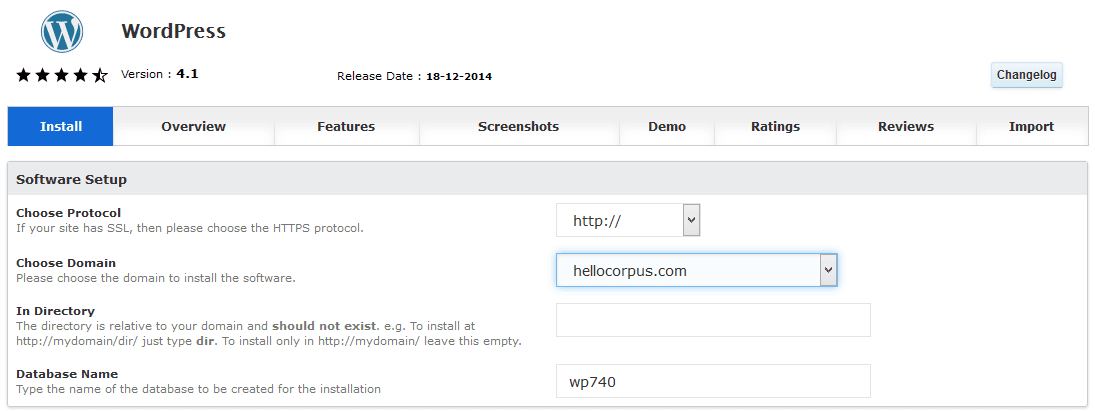
7. Click Install then find your domain where it says “Choose domain”. Change the “Site Name” and “Site Description” under Site Settings. That is what will show up on the menu bar of your website.
8. Create a username and password for your WordPress.org blog and click install. It will run for a minute or two and then you should be all set up!
9. To login into your new blog you go to yourblogname.com/wp-admin and use the username and password you just picked out. You are now ready to start designing your blog! Woohoo!
Holy cow! Are yall still with me?? I hope so! I also hope that you were able to set up your custom domain as well! If you have any questions or comments or need a little more help, join our Learning to Blog Facebook group. I’ll be back next week with another post on setting up your blog design!
And if you don’t want to miss a post – sign up for our emails!
- White Chocolate Mousse - February 16, 2024
- Slow Cooker Ground Beef Tacos - October 30, 2023
- Pumpkin Cream Iced Chai Latte - October 23, 2023








Leave a Reply